


ⰱ5 JimVonBaden/JVB Productions
ﳰan>
R1200 24K service (2004-2009 Hexhead)
Caution: This pictorial is for informational purposes only. I accept no responsibility for accuracy, or any damage caused to your motorcycle if you choose to perform these maintenance items.
Note: This service works the same on the R1100/1150 bikes as well, with differences noted during the pictorial in Red.
This is very picture heavy, but a decent step-by-step. I forgot a couple pictures, but you can figure it out from what I have here.
Hope this is useful to those who donਡve access to a tech day.
NOTE: Make sure the engine is cool to the touch before adjusting the valves.
Read all the way through before trying this.
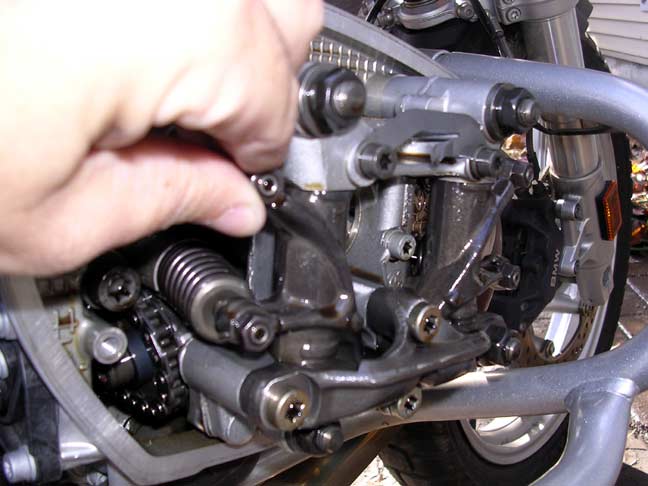
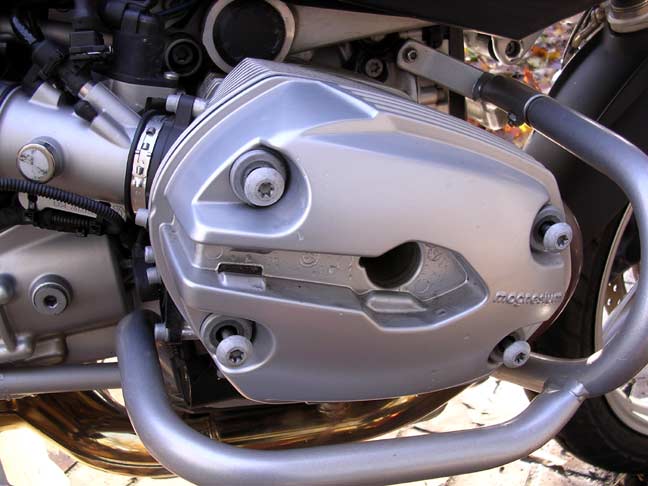
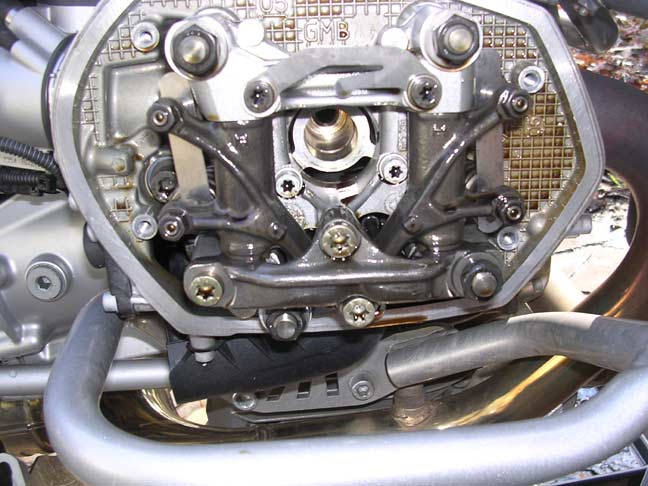
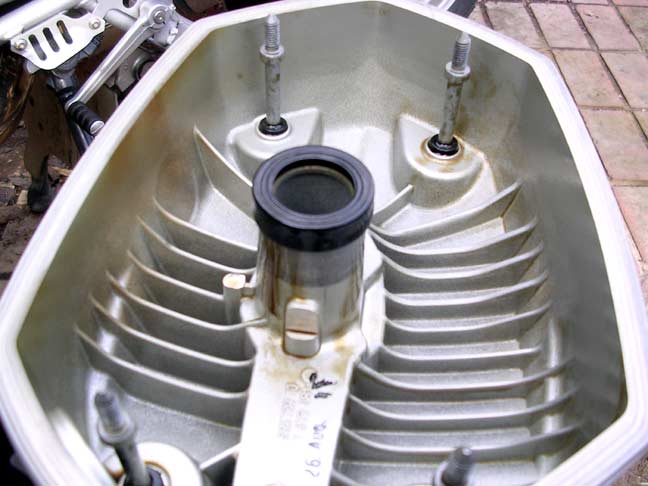
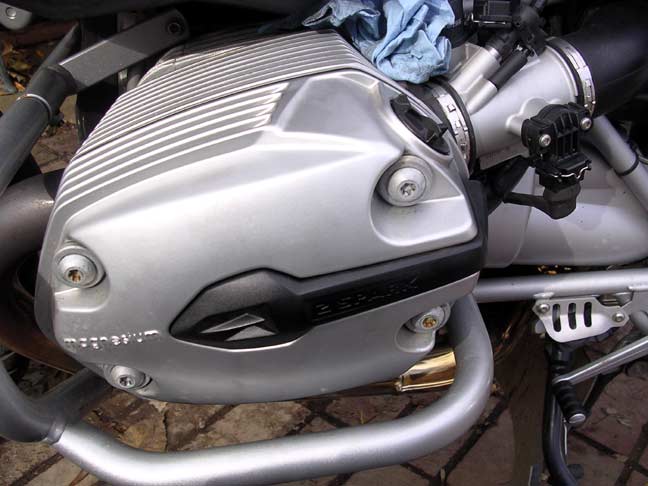
The valve cover just getting started.
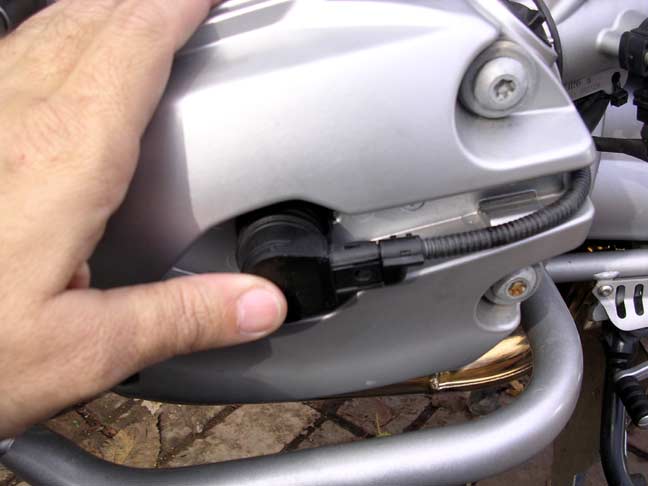
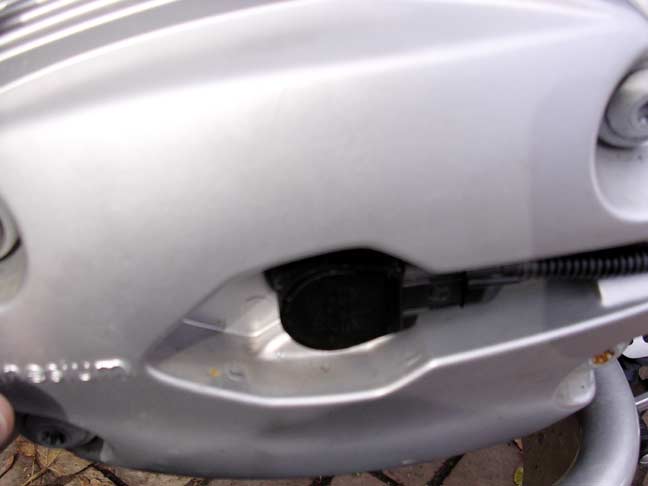
Pop off the plug wire cover. Just pull from the wire end. I use a screwdriver and it just popght off.
Then remove the spark plug wire. I use a screwdriver to simply pry it out. I now use a Marc Parnes plug wire puller. www.marcparnes.com
Pop off the plug wire cover. Just pull from the wire end. I use a screwdriver and it just popght off.
Then remove the spark plug wire. I use a screwdriver to simply pry it out. I now use a Marc Parnes plug wire puller. www.marcparnes.com
Loosen the valve cover bolts. The come loose, but do not come out all the way.
Then pull off the valve cover. Mine needed a little tap with the heal of my hand to break it loose.
You generally will not need new gaskets for this, even after several services.
Then pull off the valve cover. Mine needed a little tap with the heal of my hand to break it loose.
You generally will not need new gaskets for this, even after several services.
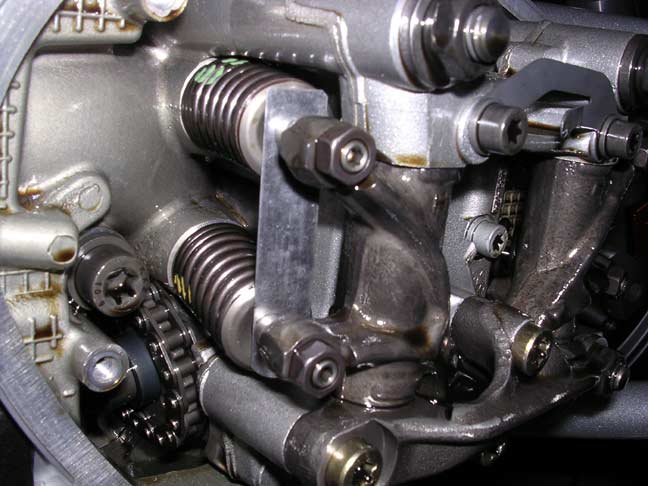
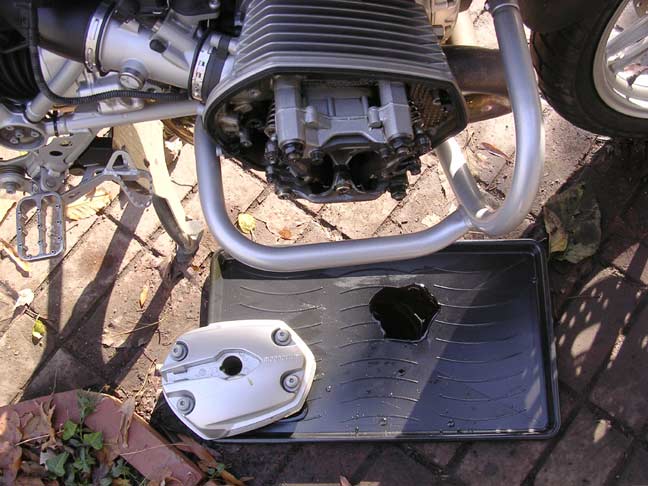
The Valve Cover removed. The drip pan is a cheap plastic one from the dollar store. I have been known to use a cookie sheet.
Note: The small amount of oil. That is all that normally falls out when removing the valve cover.
Note: The small amount of oil. That is all that normally falls out when removing the valve cover.
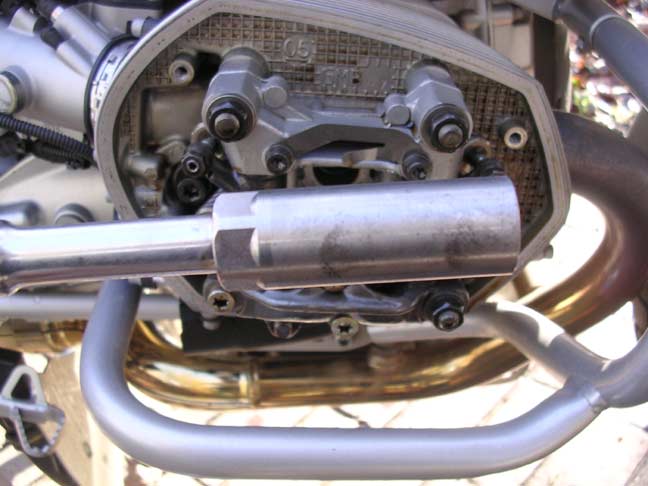
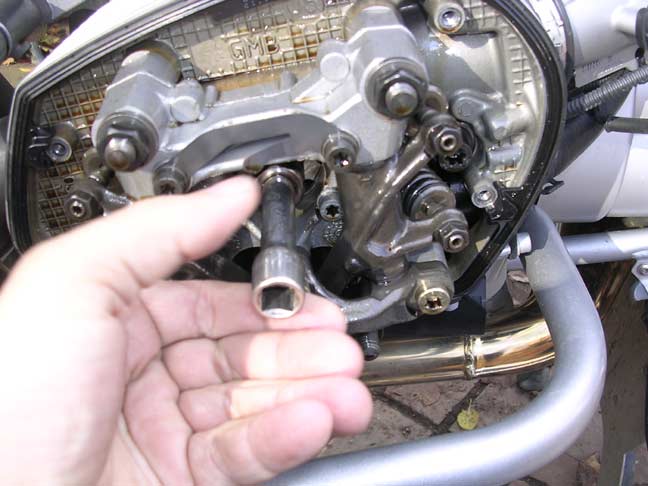
This is a special plug wrench. Actually a trimmed down Craftsman 16mm spark plug wrench. It makes it easier to get the socket in and out. The spark plug wrench from an R1100/1150 will also work, or you can buy one from BMW for about $18. Others also report that a thinwalled 16mm, or 5/6" socket works.
Loosen the plug with the ratchet, then pull it out.
At this point you need to do the same for the other side. Take off the valve cover and remove the spark plug.
At this point you need to do the same for the other side. Take off the valve cover and remove the spark plug.
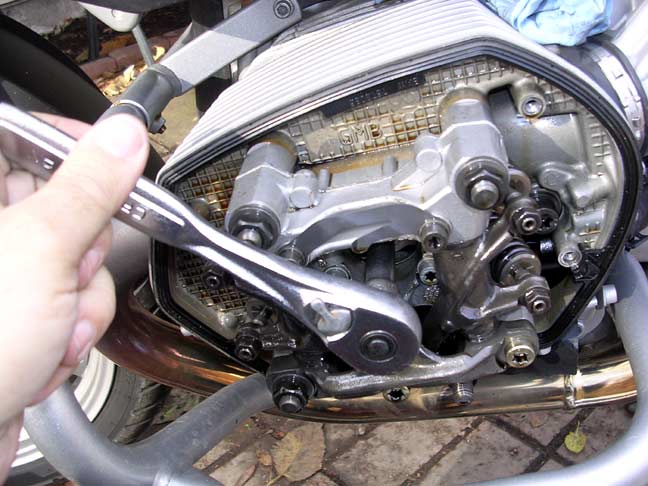
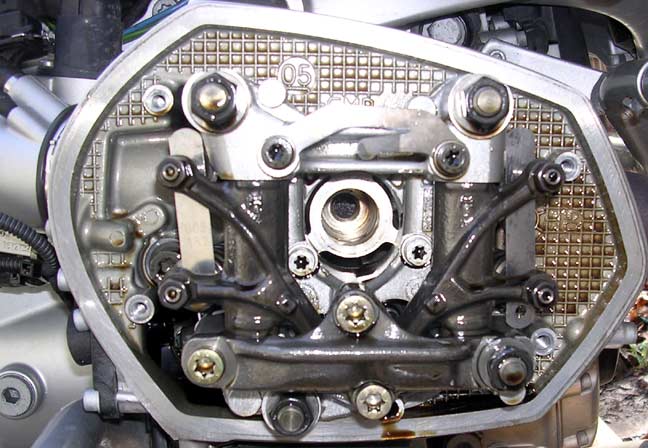
Check the right rocker arms for looseness. Both intake and exhaust must be loose.
Also for the R1100/1150 If not check the other side. Whichever side is loose is the side you start on.
Also for the R1100/1150 If not check the other side. Whichever side is loose is the side you start on.
With the engine in 6th gear rotate the engine by turning the rear wheel until the arrow on the cam sprocket is pointing straight out for the right side.
Before getting started with valve clearance, check the rocker arm end play with feeler gages. It should be between .05mm and .40mm.
Note, if not, you need to adjust the gap by loosening the head and associated bolts, and tapping the rocker arm mounts until the gap is correct. Then you need to retorque the head bolts. Large nut is 20nm, then turn 180നe remaining three are 20NM.
NOTE: My early DVDs say 40nm for the three smaller bolts, that is wrong, it is 20nm. I sent out an e-mail to everyone I have sold a DVD to explaining this. New DVD's as of December 1, 2008 are correct, first generation DVDs have the new spec on the handout that came with the DVD.
Using a .15mm feeler gage, and a .30mm feeler gage, I am ready to check valve clearance.
Note the .15mm gage is cut short (2.25") for clearance of the head lugs.
I use a modified version of valve adjustment method. It is much simpler, and allows for very quick, but very accurate adjustment of the valve gaps. The book way is finicky and frustrating.
Note the .15mm gage is cut short (2.25") for clearance of the head lugs.
I use a modified version of valve adjustment method. It is much simpler, and allows for very quick, but very accurate adjustment of the valve gaps. The book way is finicky and frustrating.
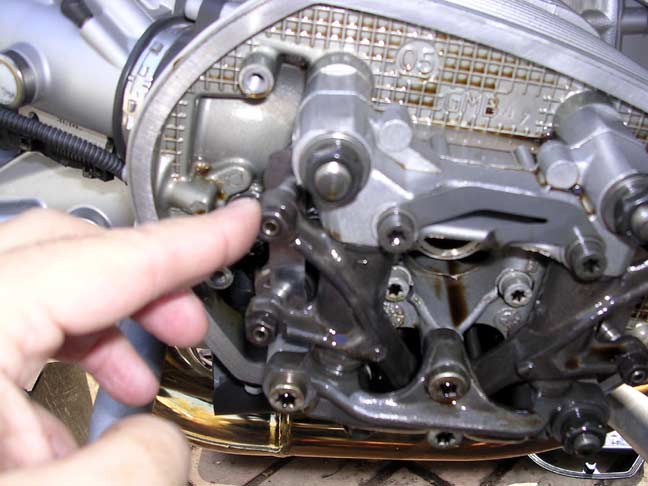
First I place both feeler gages in behind the valve and rocker arm. Notice how they are covering both valves. The .15mm on the intake, and the .30mm on the exhaust valves. Covering both at the same time helps with accuracy, and makes checking them after adjustment easier.
Here is a close-up of how they go in.
Loosen all four adjuster nuts.
Make sure they are at least one full turn loose.
Start on either intake or exhaust, it doesnୡtter.
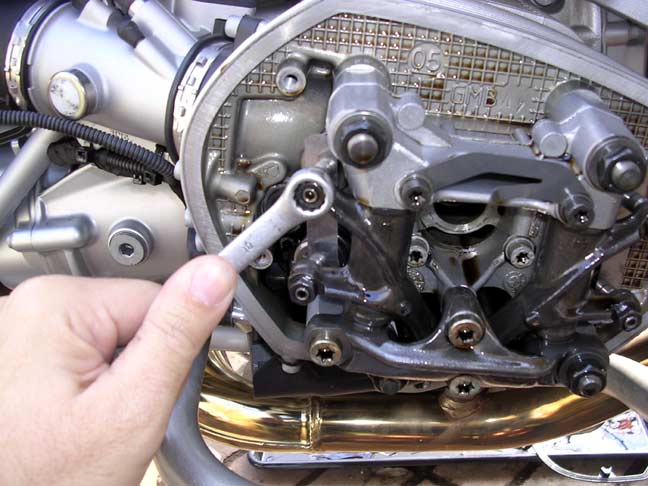
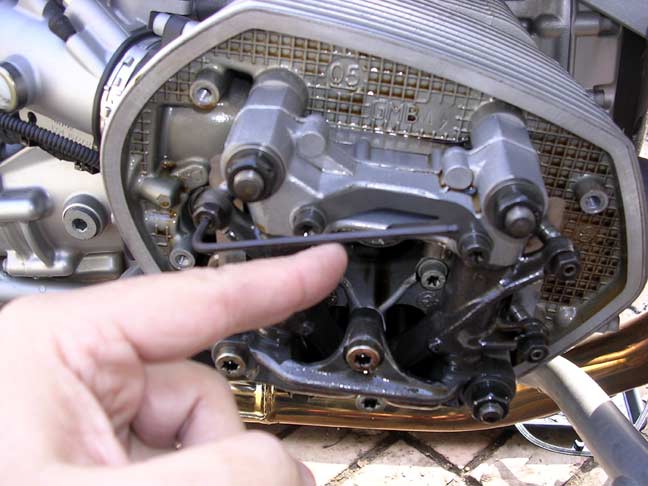
Place a 3mm Allen wrench in as shown. Make sure it is at about 2 O쯣k and moves smoothly.
Hold it with your finger, then let it go. It should move about 40ﲠso.
Place a 3mm Allen wrench in as shown. Make sure it is at about 2 O쯣k and moves smoothly.
Hold it with your finger, then let it go. It should move about 40ﲠso.
See it at the natural stopping point. This point varies, so do this several times to determine its natural stopping point. This tensions the adjuster just right, and allows you to be consistent.
Now here is the tricky part. Hold the Allen wrench firmly at its natural stopping point.
Then spin the nut down, and tighten it gently with a wrench, 8nm. Do the other valve adjusters the same way.
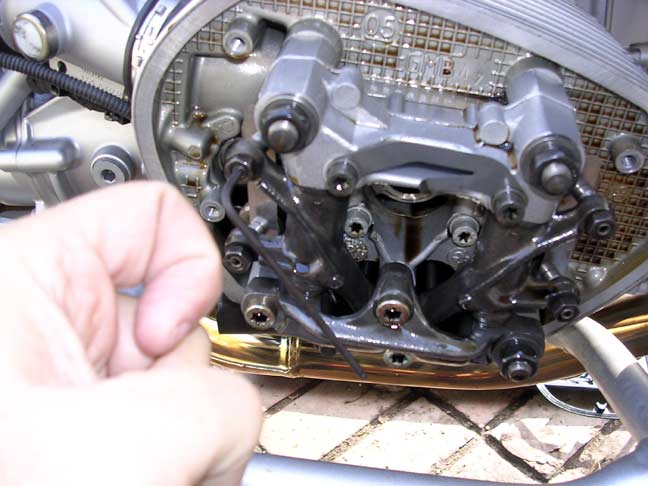
At this point, sorry no picture, place your thumb and forefinger on the center of the feeler gage and slide it in and out. You should feel even drag on the feeler gage. If one valve is tighter than the other the gage will pull out crooked. Redo the tight valve. It should feel fairly easy to slide the feeler gage in and out.
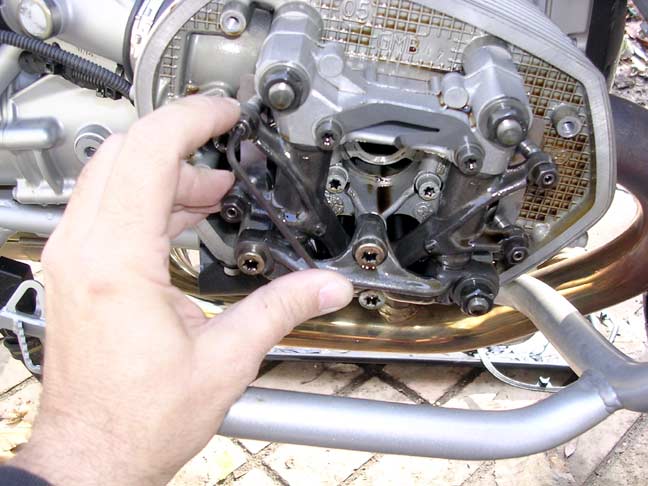
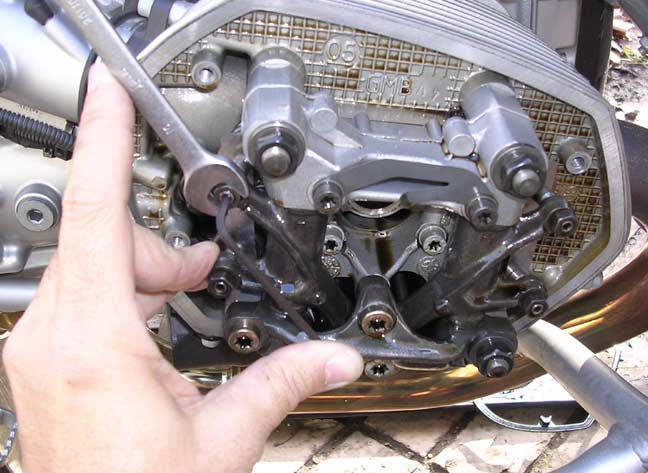
When done, tighten all the adjuster nuts, and retest the tension on the feeler gages.
Note: If you like you can use a torque wrench at 8nm, but wait until you get all the adjustments done, tighten the adjuster nuts gently by hand, or with a torque wrench, then retest for proper adjustment.
Remove the feeler gages.
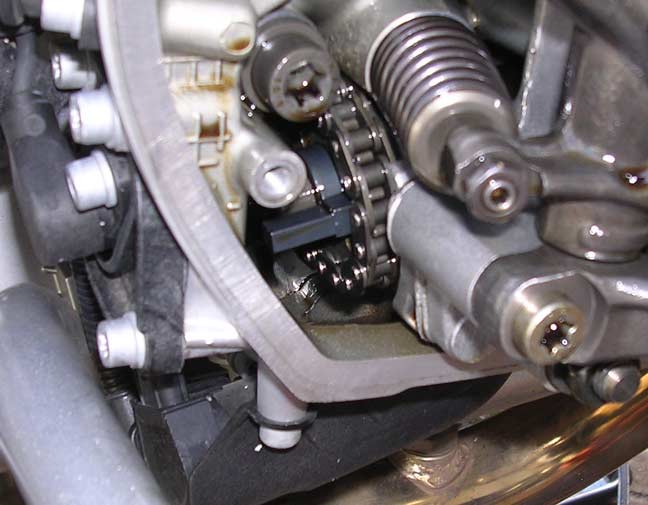
Now rotate the motor until you see this lug on the right side cam chain sprocket, still looking on the right side head, for adjusting the left side head.
NOTE: The 1100/1150 engine you will look at the LEFT cam gear for the arrow sticking straight out.
Check the looseness of the rocker arms. Both intake and exhaust should be loose. If not, rotate the engine until the lug/arrow on the 1100/1150 comes around again and check.
Follow the same procedure for the left side of the engine.
When you are done, replace the plugs. Start them by hand on the socket extension.
Then use the ratchet to tighten them down.
The torque spec is 23nm. I go with an easy stop and 1/8th turn.
Now we reinstall the valve covers.
Then use the ratchet to tighten them down.
The torque spec is 23nm. I go with an easy stop and 1/8th turn.
Now we reinstall the valve covers.
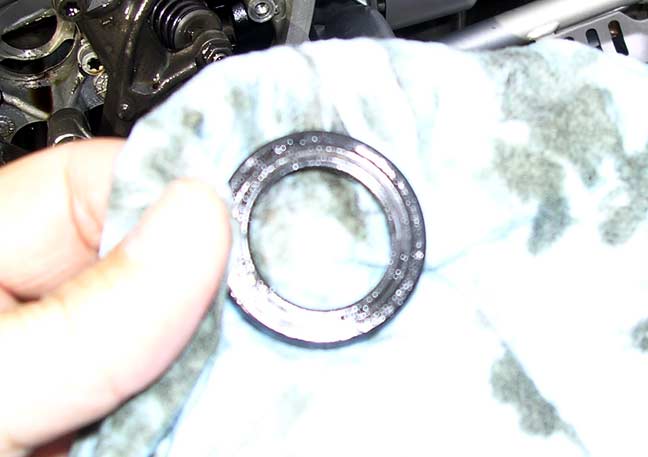
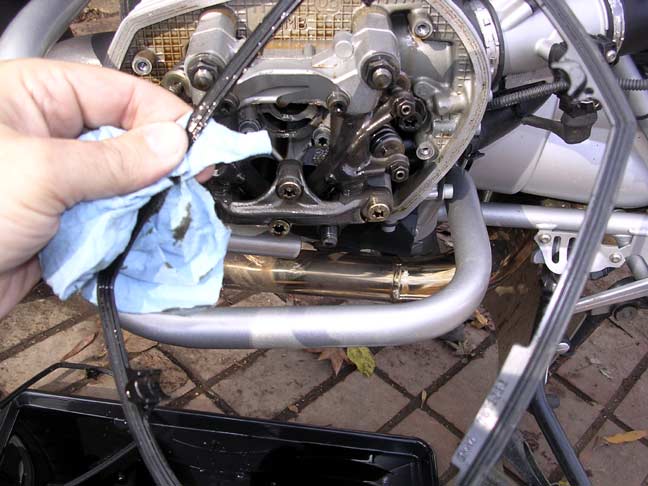
First clean the center gasket, donut gasket. I don෯rry about getting it dry, just clean.
Place the gasket firmly on the valve cover. Make sure it is all the way on.
Wipe off the outer gasket.
Now is the fun part. Push on the valve cover while aligning it with the spark plug hole. If for any reason you have to pull the cover back off even a little, pull it all the way off and replace the donut seal back on the valve cover. It is very easy for it to get partly off and it WILL leak, and likely ruin the donut seal.
When all the way on, it should look like the picture.
Tighten all four bolts, gently turning them until they hard stop, then torque diagonally to 10nm. I just give them a gentle tug holding the center of the ratchet.
When all the way on, it should look like the picture.
Tighten all four bolts, gently turning them until they hard stop, then torque diagonally to 10nm. I just give them a gentle tug holding the center of the ratchet.
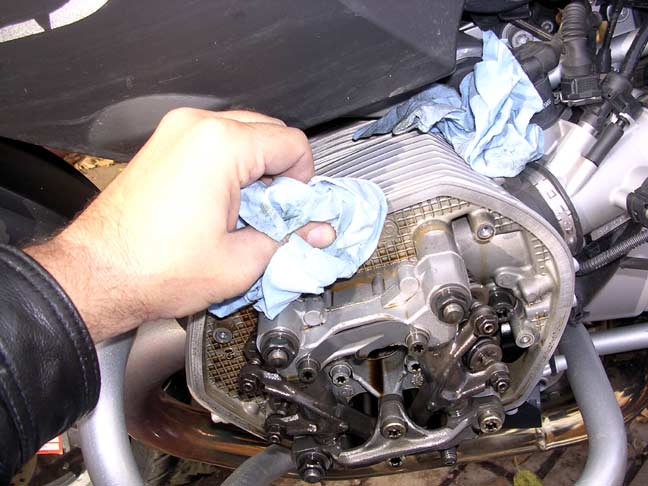
Clean the head surface. Then place the gasket back on the head.
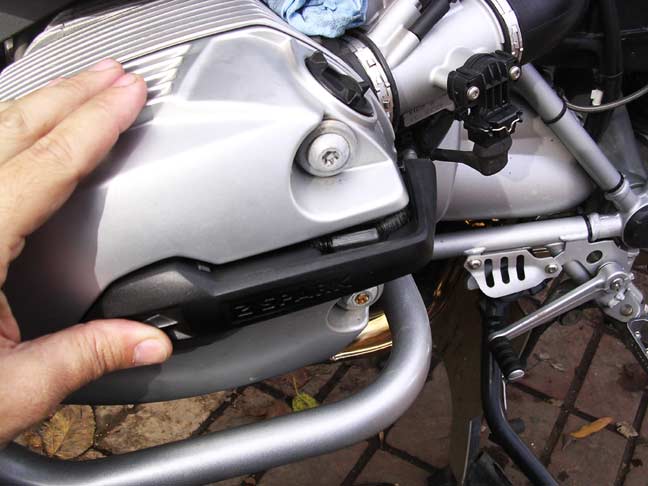
Place the plug wire in place. Press firmly.
Push it in until it snaps in place. Sometimes it wont snap, but you will know it is in place because it will look like this picture.
Place the wire cover in place with the pointed end first.
Simply push it on until it snaps in place.
At this point you are done with the valve adjustment.
I took the bike for a spin, then adjusted the throttle body sync at 2500 RPM with a Twinmax. See R1200 Throttle Body Sync.
Next we look at how to change the trans fluid and oil.
Note: I rode the bike and had it warm when I began.
At this point you are done with the valve adjustment.
I took the bike for a spin, then adjusted the throttle body sync at 2500 RPM with a Twinmax. See R1200 Throttle Body Sync.
Next we look at how to change the trans fluid and oil.
Note: I rode the bike and had it warm when I began.
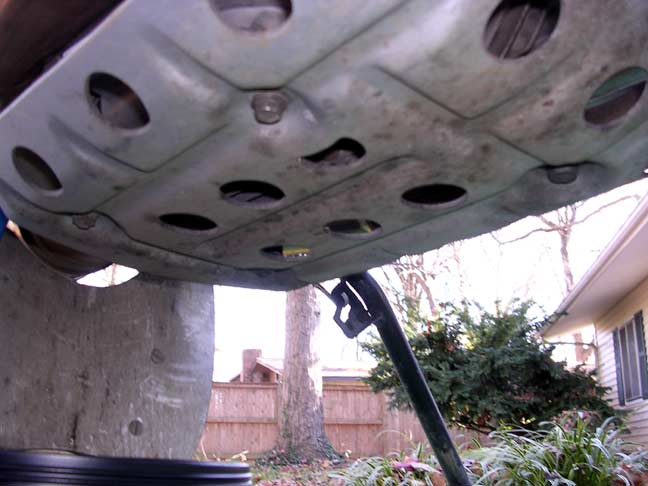
On the GS remove the bash plate.
It takes a 13mm socket, and a 10mm socket. Simply loosen the nuts, and the 10mm bolt, and the plate will fall off.
Always loosen the tranny fill bolt BEFORE draining the trans., If you cant it out, you donnt the trans empty.
The Allen is a 8mm.
The Allen is a 8mm.
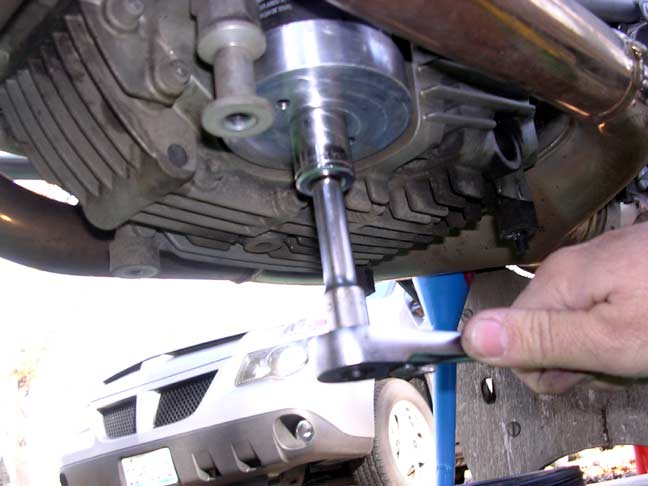
The trans drain takes a 19mm socket. Just loosen and remove the bolt.
For the 1100/1150, remove the bolt directly below the filler plug on the side of the transmission.
For the 1100/1150, remove the bolt directly below the filler plug on the side of the transmission.
Neither bolt was a magnetic kind.
Note: My trans fluid looked like new at 23,500 miles, and at 54K miles.
Note: My trans fluid looked like new at 23,500 miles, and at 54K miles.
I used a funnel to keep the oil off the exhaust and center stand.
I let the trans drain for about 10 minute. Then I reinstall the drain plug (torque at 30nm, and filled the trans up with 75W140 (BMW Spec is 75W90) synthetic gear oil. I used .8 liters, the spec is .7 to .85 liters, or to the filler hole threads on level ground with the bike on the center stand.
Reinstall the filler bolt and torque to 30nm.
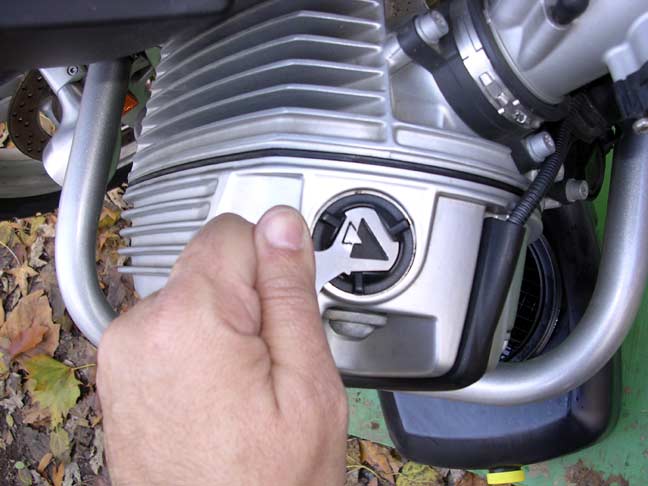
Remove the filler cap on the engine. I use a Tourtech filler cap removal tool.
Remove the oil drain plug.
Note: the oil comes out fast, so be ready with a drain pan, preferably with a screen to catch the nut if you drop it, and to allow a high oil flow.
Note: the oil comes out fast, so be ready with a drain pan, preferably with a screen to catch the nut if you drop it, and to allow a high oil flow.
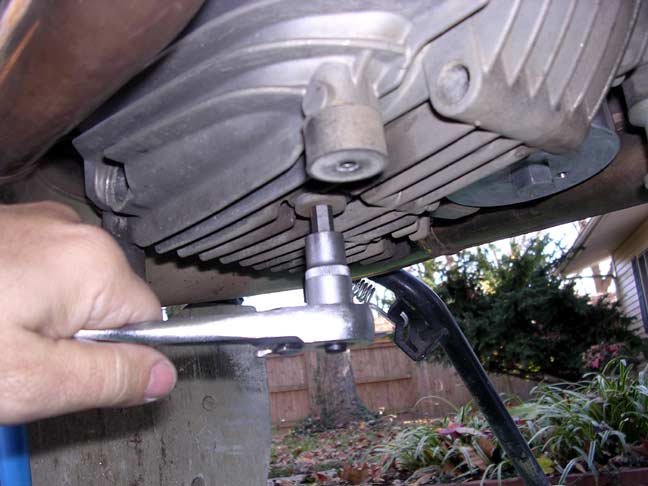
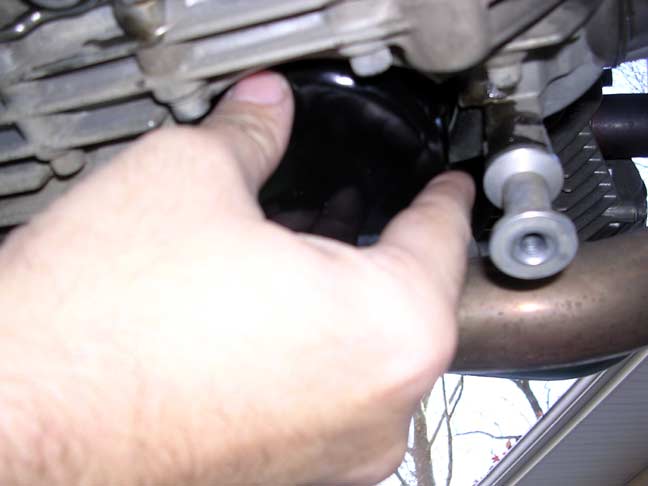
Remove the oil filter.
Note: The 1200 series takes a special wrench, available at your dealer, or several of the links on the main Links Page.
Clean the filter mating surface, and make sure the old o-ring seal came off with the filter.
Note: The 1200 series takes a special wrench, available at your dealer, or several of the links on the main Links Page.
Clean the filter mating surface, and make sure the old o-ring seal came off with the filter.
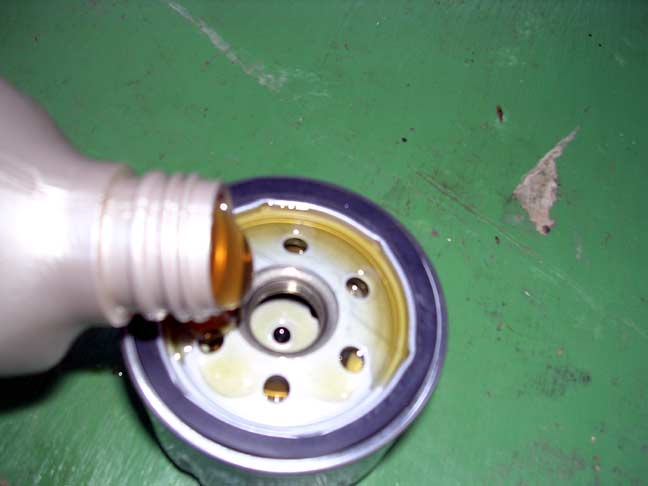
I usually fill the filter first, using a little oil on the rubber o-ring to help seal it, and keep it from sticking next time.
Install the filter by hand first.
Then tighten it down with a filter wrench. Torque is 11nm.
Replace and tighten the drain plug. Torque spec is initial torque to 23nm, final torque to 32nm.
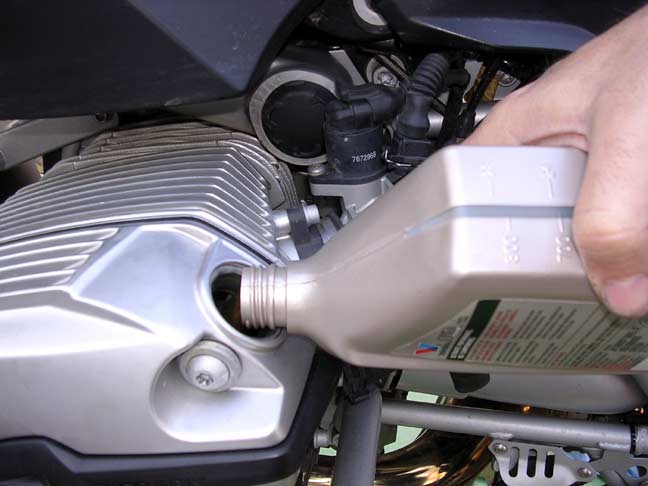
Fill the engine oil. At 24K miles you can safely use synthetic if you like. I used Valvoline 20W50 full synthetic.
The capacity is 4 liters, or just over 4 quarts, I just dump in all 4 quarts and call it good.
The capacity is 4 liters, or just over 4 quarts, I just dump in all 4 quarts and call it good.
Reinstall the bash plate.
Wash the bike. You know you should at least every 24K. Makes sure you can find the leaks, and any loose parts.
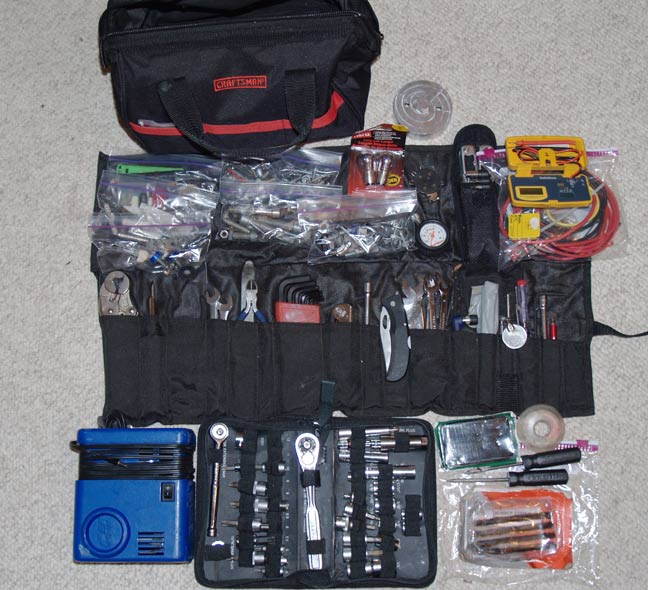
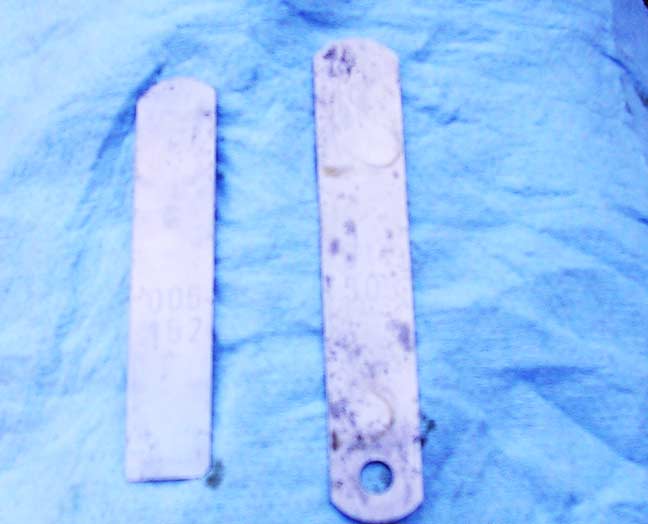
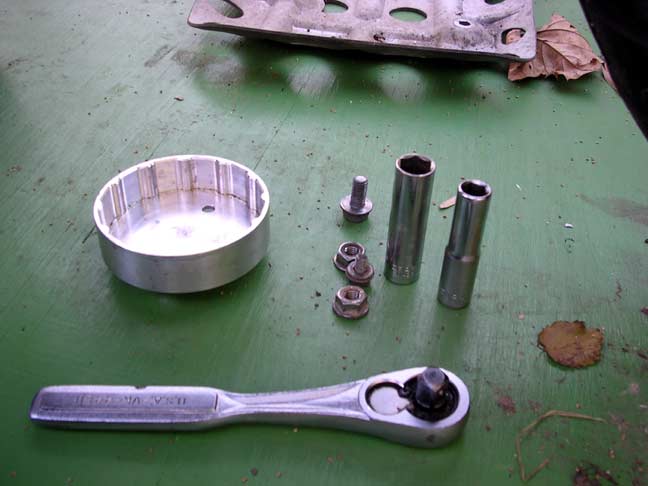
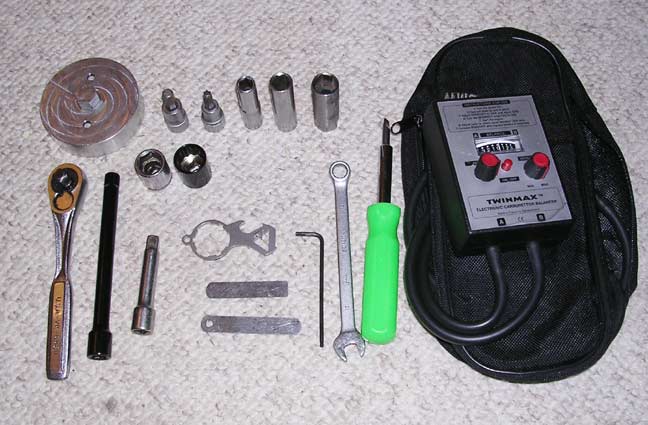
Here are the tools I needed for this.
I didn೨ow it all, but I showed most of the steps.
These bikes are very easy to work on, and I completed the 24K in about 2 hours, while taking a lot of pictures.
Jim
The Final drive fluid change is on this page .
If you are interested in a Video version covering everything needed for the R1200 36K service, go to DVD Info sales on this site.
Download PDF of this process!


Jaeger Le Coulter watch flip is the spice, a watch, between the replica omega two kinds of style, flip, is different in style, it can not only let you have two time, because can be adjusted at the swiss replica watches same time, the equivalent of two watches, you can according to your preference, different clothing collocation. The high degree of replica watches uk identification, but also to turn the watch, become everyone's eyes of the classic style.
JVB Productions
Motorcycle Maintenance and Repair Videos